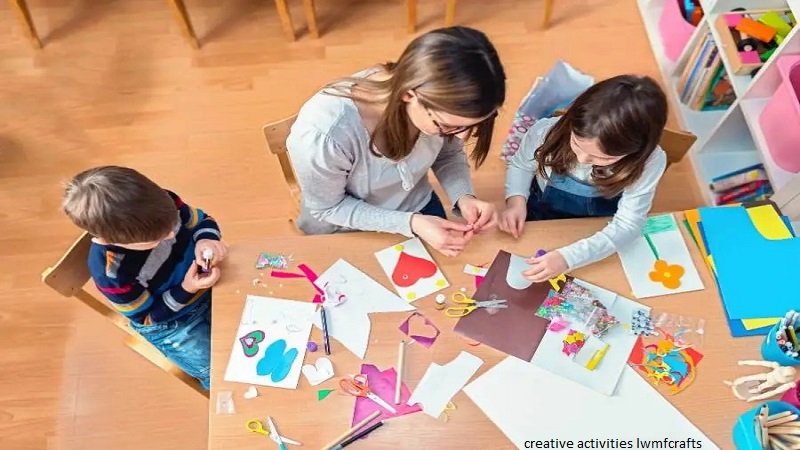
I still remember that day when my eldest daughter made a butterfly from paper when she was 5 years old. One wing of the butterfly was big and the other was small. After giving me the butterfly, she said, “Mama, how does this look?” I smiled and said, “This is perfect because you made it with your own hands,” and I put that butterfly on the fridge.
During sixteen years with my children, whatever crafting I learned, I do not think I could have learned it from any book. People mostly do not remember perfect crafts. What stays in memory is the happiness of making something with your own hands, the excitement of trying new things, and the laughter spent around the dining table.
That is why I like sharing creative activities lwmfcrafts. It is not about difficult projects, but about those ideas that bring people closer to each other and also remind us that creativity exists inside everyone.
Whether you are a parent looking for some activity for the weekend, a teacher planning projects for the classroom, or you yourself like making things with your own hands, these are the craft ideas that have brought happiness into my home.
Why I Always Choose Simple Craft Ideas
In the beginning I used to think that the bigger the project, the bigger the memories would be. I used to spend hours on one project and cut every shape perfectly, and I used to buy many supplies that I thought were necessary.
Then one afternoon changed my thinking when we all were making a detailed castle board together. But before even half the project was completed, my younger son got bored and started making small boats from colorful papers. It turned into one of our favorite quick crafts. In a short time my three children were racing boats in the kitchen after filling a bowl with water.
The castle board stayed there, and paper boats became one of our good memories. That day I understood that crafts leave more space for imagination. Everyone can participate in them, and even if mistakes happen, the fun does not become less. I learned from my experience that when a person is relaxed, their creativity comes out in a much better way.
-
Paper Roll Forest Animals
I started this project only because I did not like throwing away empty paper rolls. Instead of wasting them, I used to keep them in a basket so something could be made from them. And one weekend my children finished that basket within a few minutes.
From one roll an owl was made. From another a fox, and slowly our table became full of colorful animals.
Materials
- Empty paper rolls
- Colored paper
- Glue
- Markers
- Child-safe scissors
How We Make Them
First cover the roll with colorful paper. After that, according to the animal you want to make, cut ears, tails, wings, or little feet. In the last step, faces are drawn on the animals, which is every child’s favorite work.
What Experience Has Taught Me
When children use wrong colors for animals, many parents stop them. I never did that. One time my daughter made a purple rabbit and orange ears, and even today she remembers that rabbit because nobody told her it was wrong.
Creativity and confidence both increase when children are allowed to make their own decisions.
-
Handmade Greeting Cards
A greeting card bought from the market is also nice, but the joy of making one with your own hands is not found in bought things. This tradition started when my daughter wanted to gift me a birthday card but she did not have enough money.
I said, “Come, we will make one together.” She folded colored paper and after adding flowers wrote a message inside it. From that day birthdays, holidays, and thank-you cards became a new reason for crafting for us.
Materials
- Colored cardstock
- Markers
- Paper scraps
- Ribbon
- Glue
- Stickers or pressed flowers
How We Make Them
Fold the cardstock from the middle and decorate the front shape with flowers. Write something inside it.
These simple cards become memorable for life because they have something that printed cards do not have: time and love.
-
Painted Story Stones
This activity surprised me the most. In the beginning I thought we were just painting stones, but slowly this activity became our favorite storytelling game.
Every child made different pictures.
Someone made a house, someone made a cat, and someone made trees. And that same evening we put the painted stones into a basket. Every person picked three stones and told a story with the help of the pictures.
We did not even realize how beautifully we connected crafting with imagination, storytelling, and family time. Even today whenever relatives come to our house, these painted stones are brought out because everyone wants to make a new story.
My Tip
Try to use smooth and light-colored stones. Paint looks better on them and small details also look very beautiful.
-
Paper Flowers That Brighten Every Season
Paper flowers became a tradition in our home because fresh flowers make the house beautiful, but they do not stay for a long time. One afternoon my daughter asked me, “Mama, are there no flowers that stay bloomed the whole year?” Instead of buying artificial flowers from the market, I decided to make them myself.
Our first bouquet was not perfect at all. Some flowers were leaning to one side and some petals were crooked. But still we placed them on the dining table in a glass jar, and they made the table even more beautiful.
Materials
- Colored craft paper
- Green paper or craft sticks
- Scissors
- Glue
- Pencil
How We Make Them
Draw simple flower shapes and cut the paper. Stick two or three flowers on top of each other so the flower looks fuller. Put a small paper circle in the center and attach the flower with a green paper stem or craft stick.
Now place them in any waste glass jar.
My Crafting Tip
If you use two different shades of the same color for petals, the flower looks more natural and beautiful.
-
Memory Photo Frames
As my children grew older, this project became more special for me. Every year we select one favorite family photo and make a handmade frame for it. Today when I look at those frames, they are not only holding pictures but also telling the story of our family.
The frame made by each child reflects their personality.
Materials
- Popsicle sticks
- Glue
- Acrylic paint
- Buttons, ribbons or beads
- Printed photograph
How We Make Them
Join four popsicle sticks in a square shape using glue. After the glue dries, paint it. Then decorate it with buttons, ribbons, or beads and attach the photo at the back.
My Crafting Tip
Let the paint dry completely because this helps the glue stick properly and decorations also attach well.
Common Mistakes I See Beginners Make
If I had to give advice to a crafter, I would say do not do too much shopping in the beginning because beginners make this mistake. They buy too many things and then do not understand where to use them. They should first buy basic materials and start crafting with those.
The second mistake is that they want the same results that they see on the internet. Even my projects did not turn out the way I imagined, but there is nothing wrong with that.
Final Thoughts
When I remember the butterfly made by my daughter, I realize that the real memory is not of the butterfly but of her confidence and smile. Even today we all sit at the same dining table and enjoy crafting. That is why I share creative activities lwmfcrafts with others.
Simple crafts are not only a way to pass time, but these simple crafts increase creativity, strengthen relationships, and create beautiful memories. After sixteen years of crafting, I learned that simple craft ideas often become the most memorable.